Sambrow Journal · Markham
Ombre Brows Healing Day by Day: The Pixelation Phase No One Warns You About
14 days of soft flake, the Day 7 bumpy texture, and the Week 3 colour return — by Sam Liang
TL;DR
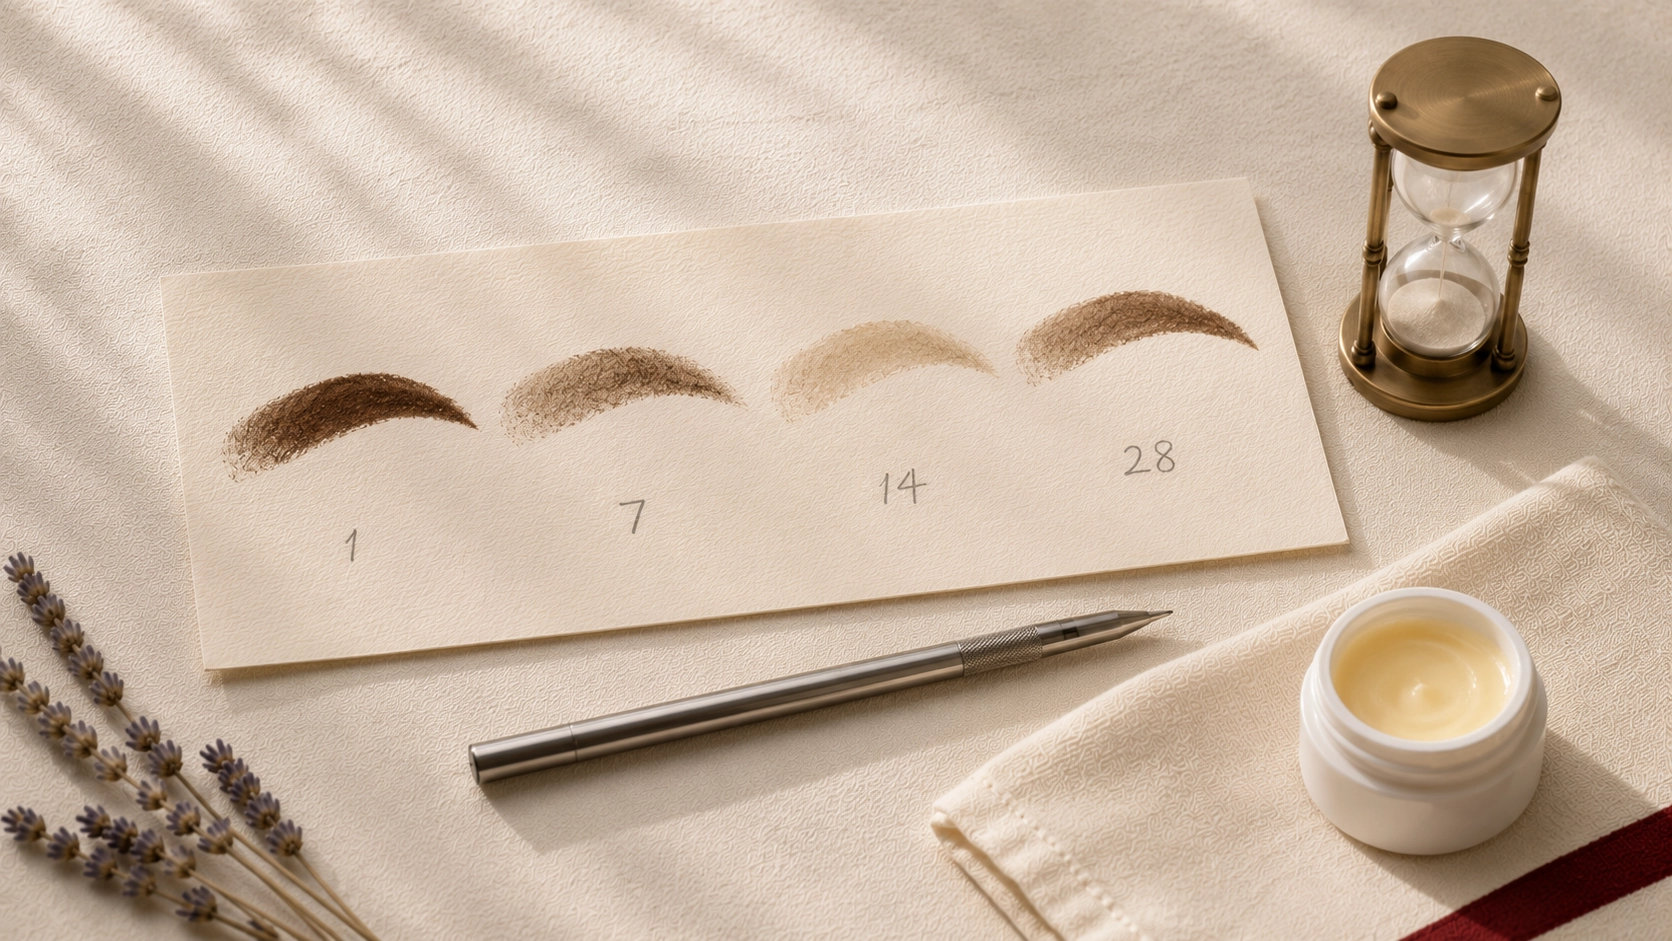
Ombre brows healing differs from microblading healing in 3 specific ways: the flake is softer and less visible (powder dot pattern sheds in micro-particles rather than distinct strokes), the Day 7 pixelation phase looks 'bumpy' or grainy (a phase microblading does not have), and the ghost-phase lightening is more uniform (40–50% lighter at Week 2 vs microblading's 30–60% spotty). Surface healing 14 days, full settle by Week 6, retention 18–22 months including the 6–8 week touch-up. The 'Day 7 bumpy' phase scares about 1 in 4 clients into messaging the artist convinced something is wrong — almost never the case. This guide walks each healing stage with what to expect, what is normal, and what is not.
If you have already read the microblading healing day-by-day guide (linked at the bottom), expect this ombre healing arc to look noticeably different — different flake pattern, different visible-result trajectory, different 'I'm worried' moments. Read once now, save it, return at Day 1, Day 7, and Day 14 — the three moments most clients second-guess perfectly normal ombre healing.
- 1
Hour 0–6
First Night: The Tightness, the Slight Warmth, the No-Touch Rule
Immediately post-session your brows feel slightly tight and warm — the inflammation response to the machine work is sealing the micro-dot pattern. Mild lymph (clear-yellow fluid) may bead at the brow surface during the first 2 hours; blot gently with sterile gauze, never wipe. Apply the prescribed Aquaphor or A&D in a paper-thin film at the 4-hour mark only. The pigment looks 1.5–2x darker than the eventual colour because surface pigment has not yet sloughed.
Do
- ✓Blot lymph beads with sterile gauze for the first 2 hours — vertical press, lift
- ✓Apply paper-thin Aquaphor / A&D at the 4-hour mark only
- ✓Sleep on your back with one extra pillow — reduces overnight swelling 30–40%
- ✓Sunglasses outdoors for any drive home — UV-sensitive immediately
Don't
- ✗Do not nap on your side or stomach — pillow friction blurs the not-yet-set dot pattern
- ✗Do not check magnifying mirror — Day 1 darkness scares many clients unnecessarily
- ✗Do not let pets near your face — bacteria and accidental contact for 72 hours
- ✗Do not apply makeup, even foundation that might transfer to brow area
- 2
Day 1–3
Acute Swelling: Brows Look Dark, Defined, Almost Overdrawn
By Day 2 morning your brows look most saturated — 2–2.5x deeper than the final colour, with crisper edges than the eventual result. This is the moment most ombre clients message worried 'they look too dark / too thick'. By Day 3 swelling has reduced 60–70% and the brows begin reading closer to their final shape. Mild itching may start as the surface dries. Daily ointment continues; daily gentle cleansing with sterile saline begins.
Do
- ✓Apply Aquaphor 3x daily in thin film — Day 1, Day 2, Day 3
- ✓Gently cleanse brow surface with sterile saline + new cotton pad twice daily
- ✓Photograph in same window light each morning to track lightening
- ✓Continue back-sleeping — 3 nights minimum for clean ombre healing
Don't
- ✗Do not judge Day 1 darkness — every ombre client thinks brows look too dark on Day 1
- ✗Do not exfoliate or rub the brow surface
- ✗Do not apply skincare with retinol, AHA / BHA within 1cm of brow
- ✗Do not exercise — sweat lifts pigment
- 3
Day 4–7
The Pixelation Phase: Bumpy, Grainy Texture Most Clients Have Never Heard About
This is unique to ombre and powder techniques. Around Day 4 the brow surface develops a slightly bumpy, grainy texture as the dot-pattern pigment is encapsulated by new skin. By Day 5–7 brows can feel raised under fingertip and look uneven in certain lighting — like fine sandpaper. This is normal and not visible from conversational distance. The texture resolves by Day 10 as new skin layers smooth. About 1 in 4 ombre clients message the artist during this phase convinced something is wrong — it is not.
Do
- ✓Trust the timeline — the bumpy phase resolves Day 8–10
- ✓Reduce ointment to 2x daily (morning + bed) — let skin breathe
- ✓Continue gentle saline cleansing
- ✓Keep documenting daily photos — the lightening progression continues
Don't
- ✗Do not pick or exfoliate the bumpy surface — this disrupts the dot-pattern integrity
- ✗Do not rub vigorously when applying anything
- ✗Do not switch to oily moisturisers near the brow area
- ✗Do not panic-book a correction — Day 7 is the lowest visual trust point of the whole healing arc
- 4
Day 8–14
The Ghost Phase: Lighter, Patchier-Seeming Brows
Powder brows ghost-phase is more uniform than microblading's — brows look 40–50% lighter than Day 1 across the whole surface, rather than spotty. This is when the surface flake has completed and new skin covers the dermal pigment, which is still settling. By Day 12–14 the colour begins to resurface as the new skin layer thins. Continue with minimal interference — no skincare actives near brows, no exfoliation, no makeup over the brow surface until Day 15.
Do
- ✓Continue daily photo documentation — Day 8, 11, 14 in same lighting
- ✓Stop ointment on Day 10 — skin is ready to breathe
- ✓Begin gentle moisturiser (no actives) from Day 12
- ✓Continue SPF starting Day 15 — non-negotiable for retention
Don't
- ✗Do not assume colour did not take — Week 2 is uniformly lighter, this is normal
- ✗Do not book emergency touch-up
- ✗Do not start makeup over the brow yet
- ✗Do not compare to other clients' Day 14 — every healing curve is slightly different
- 5
Day 15–28
Colour Resurfacing: The Final Powder Settles
From Day 15 to Day 28 the colour gradually returns as the new skin layer thins further. By Day 21 brows typically read 70–80% of final intensity; by Day 28 they sit at 95%. This is when you first see exactly where the ombre is even and where it needs touch-up support. Document any spots that look lighter than the rest — these become the touch-up plan at Week 6–8. Make-up resumes from Day 15 with a fresh tube of brow product.
Do
- ✓Resume normal brow makeup from Day 15 with new product
- ✓Daily SPF on brows — non-negotiable
- ✓Note uneven spots for week 6–8 touch-up
- ✓Resume exercise from Day 14, swimming and sauna from Day 21
Don't
- ✗Do not apply retinol or AHA / BHA within 1cm of brow until 6 weeks
- ✗Do not get a brow wax / tint within 6 weeks
- ✗Do not assume final shape is set — touch-up at Week 6–8 refines
- ✗Do not skip SPF — UV is the leading cause of premature ombre fade
- 6
Week 6–8
Touch-Up Window: Where Ombre Achieves Final Polish
Ombre touch-up at Week 6–8 is when 60–80% retention from Session 1 becomes the final balanced colour. The artist fills in lighter areas, adjusts overall saturation, refines the gradient (denser at tail, lighter at front), and corrects any minor asymmetry. Session is shorter than the initial — typically 45–60 minutes. Same 14-day healing protocol applies after touch-up. Confirm with Sambrow whether the follow-up is included or separately priced.
Do
- ✓Book touch-up between Week 6 and Week 8
- ✓Bring photo documentation of Day 1, 7, 14, 21, 28 for artist
- ✓Avoid sun and exfoliation for 5 days before touch-up
- ✓Re-read first-night protocol before going in
Don't
- ✗Do not skip touch-up — long-term result drops by 30–40% retention
- ✗Do not change artists for touch-up
- ✗Do not ask for 'much darker' unless healed result is clearly too light
- ✗Do not expect touch-up to look different same-day — it has its own 14-day healing
Universal Ombre Healing Rules
- ✦Sterile saline only for cleansing through Day 7 — no tap water on brow surface
- ✦Aquaphor or A&D paper-thin, 3x daily through Day 10 — never thick
- ✦SPF 30+ on brows from Day 15 — daily, year-round, including winter
- ✦Back-sleep minimum 3 nights, fresh pillowcase each
- ✦No retinol / acids / actives within 1cm of brow for 6 weeks total
- ✦Photo log Day 1, 3, 7, 14, 21, 28 in matched lighting
- ✦No swimming, sauna, gym sweat for 14 days
- ✦Day 7 'bumpy phase' is normal — do not interpret it as complication
Frequently Asked Questions About Ombre Brows Healing
Why don't I see ombre brows mentioned in the microblading healing guide? +
Ombre healing is meaningfully different — different flake pattern, different ghost phase timing, the Day 7 pixelation phase that does not occur in microblading. We separate the guides because following microblading aftercare for an ombre case can cause unnecessary worry (and sometimes wrong actions like exfoliating the bumpy texture). Use the right guide for your technique.
What does the Day 7 'pixelation' look like specifically? +
Imagine the texture of very fine sandpaper visible only under direct angled light. The brow surface looks slightly raised, with a grain you can feel under fingertip. Not visible from conversation distance (60cm+) and not noticeable in normal indoor light. Photographs taken with flash can exaggerate the texture making it look worse than it is. It resolves naturally by Day 10.
My brows look uneven on Day 12 — should I worry? +
Almost never. Day 8–14 is the ghost phase — brows look uniformly lighter but spot-to-spot variability is also at its visual peak. By Day 21 the colour resurfaces and most apparent unevenness disappears. By Week 6–8 touch-up the artist addresses any genuine retention gaps. About 80% of 'uneven on Day 12' worries resolve without intervention.
Can I shape my brows with tweezers during healing? +
Day 1–14: no tweezing within the treated zone (the ombre area). After Day 15: light tweezing outside the treated zone (above and below the brow body) is fine. Day 21+: light shaping within the treated zone OK if done very gently. Brow wax or thread: wait full 6 weeks. The biggest tweezing risk in healing is accidentally lifting a still-healing scab — gentle handling matters.
Why is the Day 1 colour so much darker than what I chose? +
Three combined factors: surface pigment sits on top before sloughing (contributes about 50% of Day 1 saturation), acute inflammation visually concentrates pigment by swelling tissue (about 30%), and indoor / yellow lighting amplifies brown / red wavelengths (about 20%). All three resolve by Week 2. Photograph in window daylight to see the true colour beginning to emerge by Day 5.
Should I apply ointment to my brows at night during healing? +
Yes through Day 10 — overnight ointment helps the surface stay supple as it sheds. Apply a thin film at bedtime, no more than half a grain of rice across both brows total. Avoid pillowcase contact for the first 30 minutes after applying (sit up reading or scrolling) so the ointment absorbs before transfer. Stop nighttime ointment Day 11 onward.
Can I cover my brows with bangs / a hat during healing? +
Hats yes (preferably wide-brim for sun protection from Day 1). Bangs that brush against brows: no for 14 days — friction lifts pigment and bangs carry skin oils and product residue that can introduce contamination. If you typically wear bangs, clip them up for 14 days or wear a soft headband to keep hair off the brow area.
When can I get a facial / chemical peel after ombre? +
Facial without actives (basic cleanse, mask, gentle massage avoiding brow area): Day 21+. Chemical peel, microdermabrasion, dermaplane that touches the forehead: minimum 6 weeks. Tell your facialist about the ombre brows before the session — they will adjust technique. Strong peels (TCA, glycolic 30%+) within 6 weeks risk pulling pigment from the still-stabilising surface.
Want to compare techniques or check aftercare across categories?